Jet's Pizza Weight Watchers Points
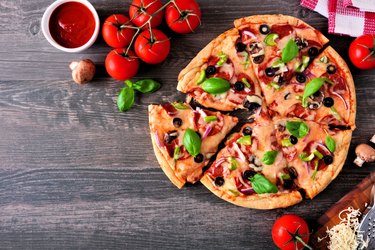
Weight Watchers pizza points, or SmartPoints, can amount to five to 16 per slice, depending on crust thickness, pie size and the types and number of toppings.
Image Credit: jenifoto/iStock/GettyImages
If you're aiming to lose weight or get healthy as a member of Weight Watchers Reimagined, a cheesy slice of pizza doesn't have to derail your goals. Though Weight Watchers pizza points can equal up to 16 per slice, you can make smart topping and crust choices to bring that number down to five.
Tip
Weight Watchers pizza points, or SmartPoints, can amount to five to 16 per slice, depending on crust thickness, pie size and the types and number of toppings.
Pizza by the Numbers
According to the USDA, one in eight Americans eat pizza — called the most popular food in the world — on any given day. And who could blame us? The fatty, salty, crusty dish satisfies many cravings at once.
But because pizza is often just white dough topped with greasy cheese, overindulging in it can eat up most of your Weight Watchers SmartPoints for the day. It can also wreak havoc on your goals to lose weight.
For example, one slice of a Domino's 12-inch hand-tossed regular cheese pizza contains 220 calories, which amounts to 11 percent of your daily calories based on a 2,000-calorie-per-day diet. That same slice contains 3.5 grams of saturated fat (17.5 percent of the recommended daily value, or RDV) and 450 milligrams of sodium (18.8 percent of the RDV).
The good news is, there are quick and easy changes you can make to your pizza while cooking or ordering — such as topping and crust swaps — that will decrease the total calories and SmartPoints in each slice. These healthier choices can also make your pizza more nutritious.
Weight Watchers Pizza Cheat Sheet
Weight Watchers Reimagined, also known as WW, assigns SmartPoints to foods based on four categories: calories, sugar, saturated fat and protein. The more calories, sugar and saturated fat in a food, the higher its SmartPoints value. On the other hand, protein lowers the SmartPoints value of a food.
Cheese, pepperoni and sausage are high-calorie foods that are also high in saturated fat. The more of these three toppings on your pizza, the higher its SmartPoints value. Conversely, if you use lean protein, such as skinless chicken breast, on your pizza instead of pepperoni and sausage, you will decrease your meal's SmartPoints value.
The handy Weight Watchers pizza cheat sheet offers suggestions such as these and can help guide your pizza-eating decisions. It offers a breakdown of pizza by type and assigns a SmartPoints value to each. You can also use the Weight Watchers points calculator or download the WW phone app to help you calculate the SmartPoints in your slice.
Keeping it Simple: Cheese Pizza
According to the Weight Watchers pizza cheat sheet, one slice of cheese pizza, depending on crust thickness, has the following SmartPoints value:
- A "regular" cheese slice with a medium crust, served at your typical pizza parlor, has a value of nine SmartPoints.
- Just swapping medium crust for thin crust brings down the total per slice to eight SmartPoints.
- Once slice of thick-crust cheese pizza (not as thick as deep dish) totals 10 SmartPoints.
The WW pizza cheat sheet also recommends steering clear of white pizza, or pizza made without tomato sauce. To make up for not having sauce, white pizza is often topped with more cheese than a regular cheese pizza. This ups the calories and saturated fat in each slice, and also its SmartPoints value.
Tomato sauce is also high in lycopene, an antioxidant that has been shown to lower blood pressure and may lower risk of certain types of cancer, according to the International Food Information Council Foundation. A March 2016 study published in the American Journal of Clinical Nutrition found that increased consumption of tomato sauce was associated with a decreased risk of getting prostate cancer. Tip: Don't skimp on the tomato sauce.
New-York-Style Pizza
Everything is bigger in New York, including the pizza. While a medium-sized pizza pie is generally around 12 inches in diameter, many New York pizza parlors serve slices from an 18-inch pie.
One slice from a New-York-style pizza is the equivalent of more than two regular slices, according to the Weight Watchers pizza cheat sheet. It also has a value of 14 to 16 SmartPoints.
If you're in the Big Apple and find yourself at a pizza parlor serving these massive slices, you can go ahead and indulge. Just be mindful of portion control and SmartPoints values.
One way you can decrease the SmartPoints value of your meal is by cutting your New York slice in half. Share the other half with a friend, and the SmartPoints value of your slice goes down to seven to eight points.
Chicago-Style Deep-Dish Pizza
Eating pizza in Chicago is a bit like eating lasagna. The crust can tower up to three inches in height and is usually both liberally stuffed and topped with cheese and meat. According to the Weight Watchers pizza cheat sheet, a slice of Chicago deep-dish pizza has a value of 11 to 15 SmartPoints.
If you go the deep-dish route, be mindful of what you eat the rest of the day in order to not go over your daily SmartPoints allowance. You can also request no meat or half the meat, and swap out fat-heavy pepperoni or sausage for lean protein such as ham or chicken.
Better yet, go with Chicago's second-best pizza tradition: thin crust. A slice of plain-cheese thin-crust pizza has a value of only eight SmartPoints.
Easy Nutritious Swaps
Here are some other swaps you can make to decrease the SmartPoints value of your pizza slice while increasing its nutrition:
- Don't fall for the extras. Avoid the freebies that come with your order, such as bread sticks, soda, extra cheese or meat toppings or an extra free pizza.
- Load up on the veggies. Instead of meat, add toppings such as peppers, onions, broccoli and mushrooms. Vegetables can add valuable nutrients in the form of vitamins and minerals while filling you up. Most vegetables are also ZeroPoint Foods, so they will not increase the SmartPoints value of your pizza.
- Skip or swap the crust. Ask for whole-grain crust instead of white whenever possible. Cauliflower crust when available will also up the nutrient content of your pizza while decreasing its calorie count and SmartPoints value.
Jet's Pizza Weight Watchers Points
Source: https://www.livestrong.com/article/349438-weight-watchers-points-for-pizza/